After installing DSVT, the required Domoticz devices must be prepared, the DSVT hardware module must be created, and the temperature sensors, switches, and controlled zones must be assigned.
Configuration is performed through DSVT's dedicated HTML-based setup interface. This provides a structured way to configure the system's advanced heating, cooling, domestic hot water (DHW), and buffer tank control functions.
DSVT uses the device identifiers (IDX) of sensors and switching devices that already exist in Domoticz.
Therefore, before configuring DSVT, the devices to be used must first be created or integrated into Domoticz.
The method of adding devices depends on their communication technology and the Domoticz integration being used.
DSVT supports temperature sensors available in Domoticz, regardless of whether they communicate using Wi-Fi, Zigbee, or another technology.
If a sensor is already managed by a Domoticz hardware integration or plugin, there is no need to create an additional virtual device.
However, if a Wi-Fi temperature sensor based on an ESP8266 or ESP32 sends its readings to Domoticz through a custom MQTT or HTTP integration, a virtual temperature device associated with Dummy hardware may be required.
In Domoticz, open Setup → Hardware and create a Dummy hardware device if one does not already exist.
Next, select Create Virtual Sensors for the Dummy hardware device.
The temperature values must then be updated through the selected MQTT, HTTP, or other integration method.
Both technologies are suitable for measuring temperatures in DSVT-controlled zones.
Wi-Fi sensors: generally communicate directly over the wireless network. Devices based on ESP8266 or ESP32 commonly use a continuous power supply, eliminating the need for regular battery replacement.
Zigbee sensors: generally consume very little power, allowing many models to operate on batteries. A Zigbee network can be expanded into a mesh topology using suitable mains-powered router devices.
In addition to temperature measurement, relative humidity measurement may be important for DSVT, particularly when using radiant cooling and dew point-based control.
For these applications, sensors that provide both temperature and relative humidity measurements are recommended.
Suitable Zigbee or Wi-Fi sensors can be used, provided that the required measurement data is available in Domoticz.
DSVT controls heating, cooling, and other connected equipment through switching devices available in Domoticz.
Examples include:
In the Szélessáv SmartHome system, we use various switching modules, including Athomtech 4CH Wi-Fi devices running Tasmota firmware.
These devices can also be controlled through MQTT using an appropriate Domoticz integration.
If the switching channels are already managed by a Domoticz hardware integration or plugin, they can be used directly.
If Dummy devices are required, create a separate virtual On/Off switch for each switching channel.
The actual physical operation of these virtual switches must be implemented through the appropriate MQTT, HTTP, or other communication interface.
Before configuring DSVT, verify that all required switches can be operated correctly from the Domoticz interface.
Once the sensors and switching devices have been prepared, the DSVT hardware module can be created.
Open:
Setup → Hardware
Enter a name for the new hardware module, for example:
DSVT Zone ControlFrom the hardware type list, select:
DSVT + HMV (DHW) + 12 ZONE
After selecting the plugin, its hardware configuration parameters will appear.
If DSVT and Domoticz are running on the same device:
127.0.0.18080, or the actual HTTP port used by Domoticz.If authentication is required, enter the appropriate username and password.
Local API access may also need to be enabled in the Domoticz security settings.
The Operating parameters field in the DSVT hardware configuration is mandatory.
The default value is:
0,5,15,0,NoneThis field contains the logging level, update interval, control calculation period, and additional operating settings.
For initial installation, retaining the default value is recommended.
The detailed configuration fields for temperature sensors, switches, zones, and heat sources can initially be left empty, as these settings will be configured through the DSVT HTML interface.
After checking the parameters, click the Add button.
Important: click the button only once.
Domoticz may require several seconds to create the hardware device and initialise the plugin.
Repeated clicks may create multiple DSVT hardware instances that attempt to control the same devices, potentially causing conflicts and incorrect operation.
When DSVT starts, it automatically creates the virtual devices required for its operation.
After the DSVT hardware module has been successfully created, detailed configuration can be performed using its dedicated HTML-based setup interface.
The configuration page can be accessed through the Domoticz Custom menu or the plugin's HTML setup! link.
The interface allows devices to be selected and their IDX identifiers to be assigned to the appropriate parameters.
Using the HTML configuration interface is considerably easier than manually editing the hardware configuration fields.
DSVT can manage up to 12 independent heating and cooling zones.
During configuration, the required temperature sensors and controlled devices must be assigned to each zone being used.
Each zone can be associated with devices such as:
Zones can be configured independently, allowing underfloor heating, radiator heating, radiant cooling, and air conditioning to operate within the same system.
Using all 12 zones is not mandatory. Only zones with actual sensors and controlled devices need to be configured.
After configuring the zones, the central heating and cooling equipment can be assigned.
DSVT supports primary and secondary heat source control, as well as different operating strategies.
Configuration options include:
The settings must correspond to the actual hydraulic and electrical installation.
DSVT does not replace the built-in safety controls of heating and cooling equipment.
After making changes in the HTML configuration interface, save the settings.
DSVT stores the configuration data in the Domoticz hardware parameters, allowing the settings to remain available when the plugin starts again.
After saving the configuration, verify that the selected sensors and switching devices have been correctly assigned.
Following significant configuration changes, checking plugin operation and the Domoticz log is recommended.
After the initial configuration, verify that DSVT receives sensor data correctly and controls the assigned equipment as intended.
Pay particular attention to:
If DSVT fails to start, a device cannot be reached, or the configuration page does not function correctly, first check the Domoticz log.
The log messages can help identify invalid IDX identifiers, missing files, and communication problems.
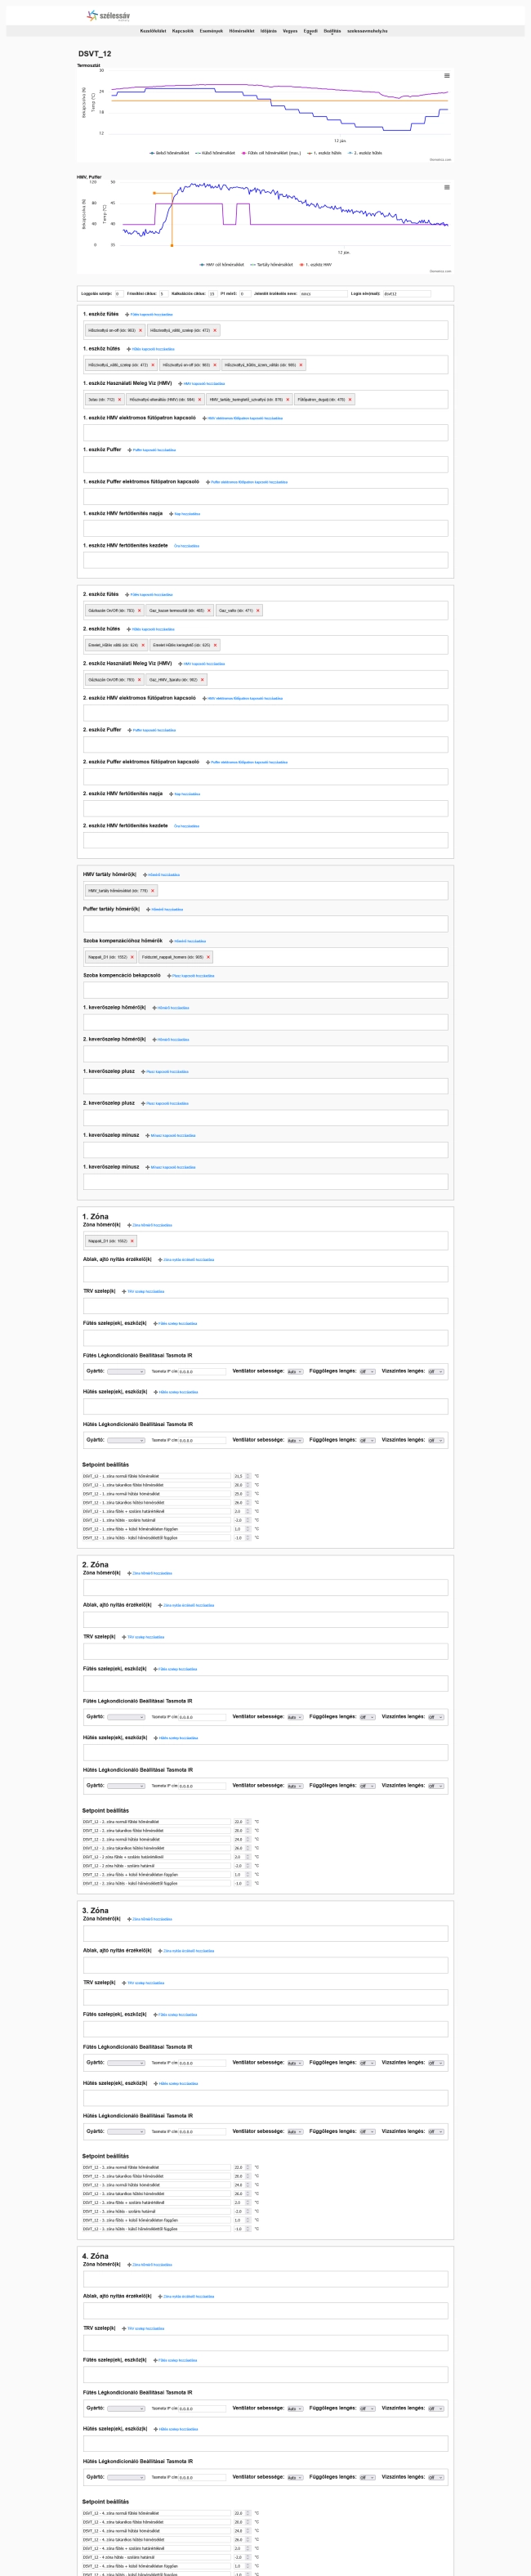
The following image shows the DSVT HTML configuration interface.
The interface provides a central location for configuring the system's sensors, zones, switches, heat sources, and additional operating parameters.
DSVT configuration uses sensors and switching devices that have already been created or integrated into Domoticz.
The first step is to prepare the required Domoticz devices, followed by creating the DSVT hardware module.
Detailed configuration is performed through DSVT's dedicated HTML interface, which supports the configuration of zones, heat sources, domestic hot water systems, buffer tanks, and other controlled equipment.
Correct configuration and verification of connected devices are essential for reliable, safe, and energy-efficient DSVT operation.